Introduction
Ever questioned how to seal jam jars the right way to keep your selfmade preserves sparkling and secure? Whether you are a primary-time jammer or a pro domestic cook, getting to know the sealing system is fundamental to locking in flavor and stopping spoilage. In this manual, we’ll walk you via easy, step-by means of-step strategies to seal jam jars well—no unique system wished!
Why is sealing so important for jam?
Sealing is not as simple as closing the lid tightly – it can isolate air and bacteria, preventing the jam from mold and taste change. A perfect seal will form a “small vacuum” that prevents microorganisms from multiplying, and can also preserve the color, taste and nutrition of the jam, so that you can eat it with confidence.
Tips on vacuum sealing
In fact, the principle is not complicated: after the air in the jar is exhausted, the air pressure outside will press the lid tightly to form a seal. First take a look at if there are any cracks in the jars and whether or not the mouth of the bottle is flat – defective jars will genuinely not seal tightly and can crack. Wash the jars, lids, and seals very well with warm soapy water and rinse them thru.
Do you want to sterilize the jars?
Choose the right method: Look at the acidity of the jam
- Most jams are highly acidic (pH≤4.6), which can inhibit bad bacteria and is suitable for water bath canning: put the jars filled with jam in boiling water for a while, which can sterilize and form a vacuum, suitable for long-term storage.
- If the jam acidity is particularly high (pH≤4.1), you can also try the hot filling method (can while hot and cover tightly), but the sealing effect is not as reliable as the water bath method, so it is not recommended for long-term storage.
Processing time is important
Generally, small jars (half pint/pint) only need to be boiled for 5 minutes in low altitude areas, and 1 minute more for every 1,000 feet of altitude. Large jars may need to be boiled for 10 minutes. For details, please refer to the USDA guide. Don’t be lazy~
Preparation before sealing
If you want to do how to seal jam jars well, you need to do some preparation. The tools and jars must be up to standard to seal smoothly.
Necessary tools list
- A deep pot (or a special water bath pot) with a lid and a rack.
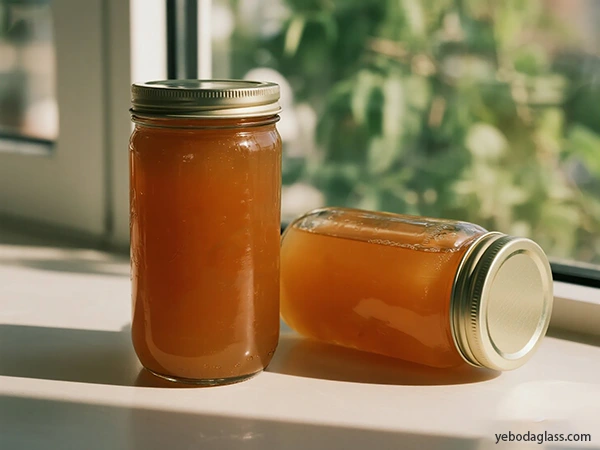
- Special glass jars (such as Mason jars), remember to match them with new flat lids (old lids are not stable).
- Common kitchen items: funnel, clamps, wooden spoon, bubble remover (or chopsticks), clean rags.
Inspect and clean jars
First take a look at if there are any cracks in the jars and whether or not the mouth of the bottle is flat – defective jars will genuinely not seal tightly and can crack. Wash the jars, lids, and seals very well with warm soapy water and rinse them thru.
Do you want to sterilize the jars?
- If the water bath time is less than 10 minutes, the jars must be boiled in boiling water for 10 minutes to sterilize (the time should be extended at high altitudes);
- If the water bath time is more than 10 minutes, just wash it clean, the high temperature will sterilize it by itself;
- Before filling the jam, do not let the jars cool completely, keep them warm, otherwise the hot jam will crack easily.
How to deal with the lid and sealing ring?
- Just wash the lid with hot soapy water, don’t boil it! High temperature will damage the rubber ring and the seal will be useless.
- Just wash and dry the metal threaded ring (sealing ring), no need to sterilize, it is best to remove it when storing to avoid rust.
Prepare the water bath pot
Add more than half of the water to the pot, put the rack on it (don’t let the jars stick directly to the bottom of the pot), boil it to a slight boil (about 82℃), and wait for use.
Step by step: Jam sealing practice
Follow these steps, how to seal jam jars is actually very simple.
Packing jam: Don’t skimp on details
Pour the jam into warm jars while it’s still hot, using a funnel. Don’t fill the jars too full, leaving 1/4 inch (about 0.6 cm) of head space. Stir the jars along the wall with chopsticks to get rid of air bubbles, and add more jam to fill them up if not enough. Be sure to wipe the jam off the jar mouth! Residue will prevent the seal from being tight.
Cover and waterbath
Put on the new lid and screw the thread ring until it’s “finger-tight” – don’t use too much force, otherwise the air won’t be exhausted. Use a clamp to put the jars into a boiling water pot, the water should be 1-2 inches above the jars, cover the lids and bring to a boil. Start timing after the water boils (according to the recipe, generally 5-10 minutes, longer at high altitudes).
Cooling and checking the seal
- After cooking, turn off the heat and let the jars stay in the pot for another 5 minutes, then carefully pick them out and place them on a towel to cool (don’t touch them or put them on a cold countertop to prevent cracking).Let the jars cool slowly for 12-24 hours, during which you may hear a “pop” sound – this is a signal that the seal is good.
- After cooling thoroughly, check: the center of the lid is concave and cannot be pressed, or the lid cannot be pulled down after removing the threaded ring, which means the seal is successful.
The last step: storage
For sealed jars, remove the threaded ring, wipe it clean, label it, and place it in a cool, dry and dark place. It can be stored for 18 months. If it is not sealed well, put it in the refrigerator quickly and eat it within a month.
Is the seal good? Here’s how to check it
- Look at the lid: the center should be concave, if it is flat or bulging, it is not sealed well.
- Press it: press the center of the lid with your finger, if it does not shake or make a “pop” sound, it is fine.
- Lift it: remove the threaded ring and gently lift the lid. If it does not move at all, it is sealed well.
- Listen to the sound: if you hear a “click” sound when cooling, it is most likely sealed successfully.
Sealing failed? It may be due to these reasons
If it is not sealed properly, first check whether you have stepped on these pitfalls:
- There is jam residue on the bottle mouth: if it is not wiped clean, it will block the lid, so be sure to wipe it thoroughly with a damp cloth.
- The jar is defective: if the bottle mouth is cracked or uneven, just change the jar.
- The head space is wrong: too full or too empty is not good, leave 1/4 inch according to the recipe.
- The lid is not right: using an old lid, boiling the lid (the rubber ring will be damaged), or the threaded ring is too loose/tight.
- Insufficient processing time: not boiling enough time, not extending the time at high altitude, will affect.
- Using ordinary bottles: not special canning bottles (such as beverage bottles), poor heat resistance and poor sealing.
- Cooling too quickly: taking it out directly after boiling and chilling it, it is easy to leak, remember to put it in the pot for 5 minutes first.
Not sealed well? Hurry up and do this
If you find that the jar is not sealed properly, don’t panic:
- Eat directly: Refrigerate and eat as soon as possible within a few days.
- Reseal: Within 24 hours, replace the lid with a new one and cook it again according to the original method (the time must be enough).
- Freeze: If you can’t reseal it, put it in a fresh-keeping box and freeze it. Remember to leave more space to prevent expansion.
If you do these, there will be no problems with how to seal jam jars, and the jam can be stored safely for a long time~
Post-sealing treatment: Make the jam last longer
After completing the sealing steps of how to seal jam jars, subsequent treatment and storage are also critical, which directly affects how long the jam can be stored and whether it tastes good.
Cooling and finishing steps
- Put the sealed jar on a towel or cooling rack first, don’t touch or stack it, let it cool slowly (12-24 hours).
- After cooling, remove the threaded ring (to prevent rusting) and wipe the jam outside the jar.
- Put a label on it, write what kind of jam it is and when it was made, so that it is convenient to check later.
Storing in this way will make the jam fresher
If you want the jam to last longer and not deteriorate, the storage environment must be particular:
- Temperature: 10-20℃ is best, not more than 25℃, too hot will make the jam taste and fade; too cold is not good, the jar may crack.
- Light: Store in a dark place! Direct sunlight will cause the jam to fade and lose nutrients.
- Humidity: Keep it dry, humidity will cause the lid to rust and the seal may be broken.
- Location: Basement, food storage room are all fine, the key is to keep it cool and stable, don’t be hot and cold.
How long is the shelf life? How to judge if it has deteriorated
- Generally, it is able to be stored for 1 12 months, and it tastes satisfactory at some stage in this period; if the excessive-sugar jam is nicely sealed, it could be stored for 18 months to 2 years.
- Reduced sugar jam can not be saved that long, the shade and texture are clean to become worse, so consume it as quickly as feasible.
- Check earlier than ingesting: the lid is bulging, there are mold spots, it smells bitter, and the jam is layered and sticky, throw them away quickly!
How to deal with it after opening?
The opened jam must be placed in the refrigerator (below 4°C), and be taken out with a clean spoon. Cover tightly after each use, and it is best to eat it within one month. Low-sugar jam is more delicate after opening, so don’t keep it for too long.
Do these things well, and the results of how to seal jam jars can be kept firmly, and you can taste the sweetness of fresh jam at any time~
New trends in home canning: more convenient in the future?
Although people still use the traditional water bath method to seal jam, new technologies are making how to seal jam jars easier and smarter.
Smart lids and monitoring technology
Although there is no popular “smart jam lid” that can detect the quality of the seal or temperature, the food industry has made new attempts – such as packaging that can monitor freshness and lids made of antibacterial materials. In the future, there may be lids with sensors to help you easily know whether the jam has gone bad. However, for now, listening for the “pop” sound and seeing if the lid is dented are still the most reliable methods. In addition, reusable plastic lids have appeared, which can solve the problem of rusting metal lids and are more environmentally friendly.
Automated canning tools
There are already small automatic canning systems that use steam and low pressure instead of water baths. They are suitable for novices or people who don’t have time, but they are currently only suitable for highly acidic foods. In the future, there may be smarter home devices that automatically control temperature and time to make sealing more worry-free.
New preservation black technology
Now the industry is trying “non-thermal processing” technology, such as cold plasma and high pressure treatment, which can sterilize without high temperature and better preserve the taste and nutrition of food. There are also nanotechnology packaging and natural antibacterial coatings, which may be used in home canning in the future to make jams last longer.
More environmentally friendly trends
In the future, more attention will be paid to sustainability: recycled glass bottles can be used again, lids can be reused, food waste can be used as packaging materials… Home canning itself is a good way to reduce waste and will be more environmentally friendly in the future.
No matter how the technology changes, the core of how to seal jam jars is still safety and convenience. Maybe in a Jam sealing is a talent that mixes science, endurance and artwork. From expertise the ideas of vacuum sealing, to deciding on a canning technique suitable for the acidity of jam, to the meticulous instruction and processing of bottles and jars, each step is crucial. The correct seal cannot only lock the delicious flavor and nutrition of the jam, but additionally make sure meals protection, so you and your family can revel in it with peace of mind.
Conclusion
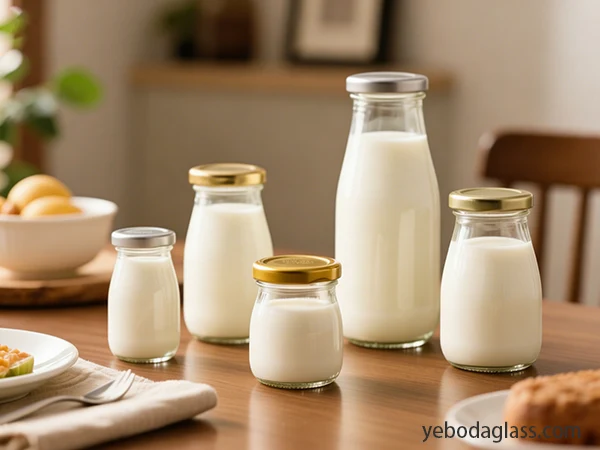
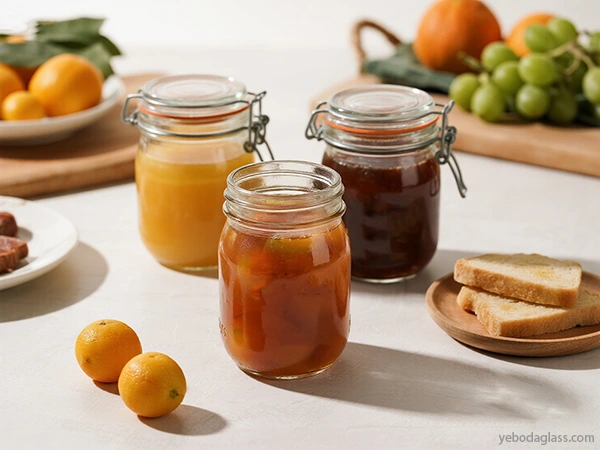
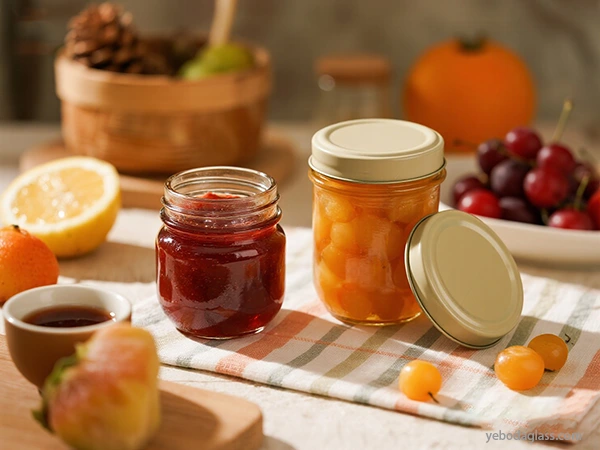
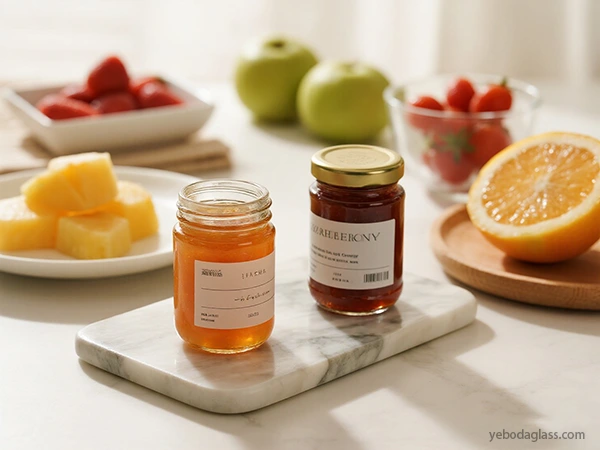
If you want to easily figure out how to seal jam jars, it is important to choose the right bottle. YEBODA jam jars are specially designed for sealing:
- The glass is thick and proof against temperature variations, and it is not clean to crack in water bathtub canning, which makes you feel secure.
- The bottle mouth is easy and geared up with a special lid for brilliant reliable sealing, so you do not need to worry approximately leakage or harm.
- Food-grade material, jam will now not be combined with flavor, so that you can eat it with self assurance.
- Food-grade material, jam will not be mixed with flavor, so you can eat it with confidence.
- It can be reused, environmentally friendly and cost-effective, helping you to lock every homemade delicacy firmly~
No matter how the technology changes, the core of how to seal jam jars is still safety and convenience. Maybe in a Jam sealing is a talent that mixes science, endurance and artwork. From expertise the ideas of vacuum sealing, to deciding on a canning technique suitable for the acidity of jam, to the meticulous instruction and processing of bottles and jars, each step is crucial. The correct seal cannot only lock the delicious flavor and nutrition of the jam, but additionally make sure meals protection, so you and your family can revel in it with peace of mind.